But anyway, tomorrow I have a new pattern to release, and this time I'm sort of super organised. Perhaps. So much so that I've pre-prepared a little blog tutorial that I want to share with you.
Tomorrow's pattern, Olinda, is reversible in the sense that there's no real wrong side to the garment. You can really wear it either way, which is great for grublets. But to make it so, you really need to sew on what I call "double duty buttons" so you can button the cardie from both sides.
Here's a quick peak of Olinda worn as the pattern is written, there's plenty more pics over on my Rav project page, and I'm sure you'll see more tomorrow.
So how do you make double duty buttons?
You need two buttons for every buttonhole, some good quality sewing thread and a hand sewing needle.
I find this style of buttons works really well for two-hole buttons and I always sew my two-hole buttons on like this.
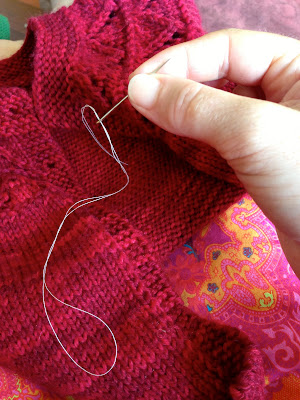
When threading my needle I always half the thread and thread the two ends through the eye of the needle, leaving the thread looped at the end.
Locate where the buttons need to be placed. I always use the garter ridges in the garter edging and the placement of the buttonhole to help line up where my buttons need to be.
Once you've got the right spot, sandwich the buttonband between the two buttons and bring the needle and thread through the two buttons leaving the loop at the back of the work.
Making sure the loop remains at the back, thread the needle back through the other front hole. The loop and the needle will both be at the back of the work now.
TO secure the thread, simply thread the needle through the loop and pull tight.
Sew on the button as usual, threading back and forth through both buttons securely a couple of times.
To finish off the buttonhole neatly, on your last pass-through with your thread to the back, only go through the front button and come out next to the back button. You will need to angle your needle and the buttons to be able to do this.
Loop the thread around the button, and the thread the needle through the loop a couple of times. Pull the thread to secure. Wrap the thread around a few more times and cut the thread. The tail will be neatly hidden behind the button.
Voila! Neatly sewn buttons perfect for double sided garments!
If you were a perfectionist, you would probably create shanks for each of your buttons as you sew them, but I'm a bit lazy.
I love this way of doing buttons. I use a lot of two-hole wooden buttons and I find that buttons sewn like this don't come loose. Nor are they placing a lot of stress on the garment itself, as in effect they reinforce each other.
Nice, hey!


What an incredibly brilliant way to start a button! I use that method in my embroidery, but never thought to use that start elsewhere. Thank you for the knowledge.
ReplyDelete